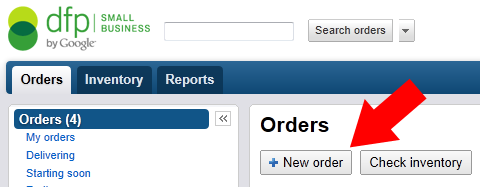
Now that we have setup DFP Tags on our site we need to setup Ads or otherwise nothing will be shown. Go to the Orders Tab which I explained in the Introduction into DFP Small Business.
To make it easier to explain how Orders and Line Items work I do this with an example:
Let’s say you have an electronics company that wants to Advertise on your site which is called ‘ISellElectronics AG’.
So you create an Order called ‘ISellElectronics AG’ with the contact details for this Advertiser like the name of the person responsible and his email.
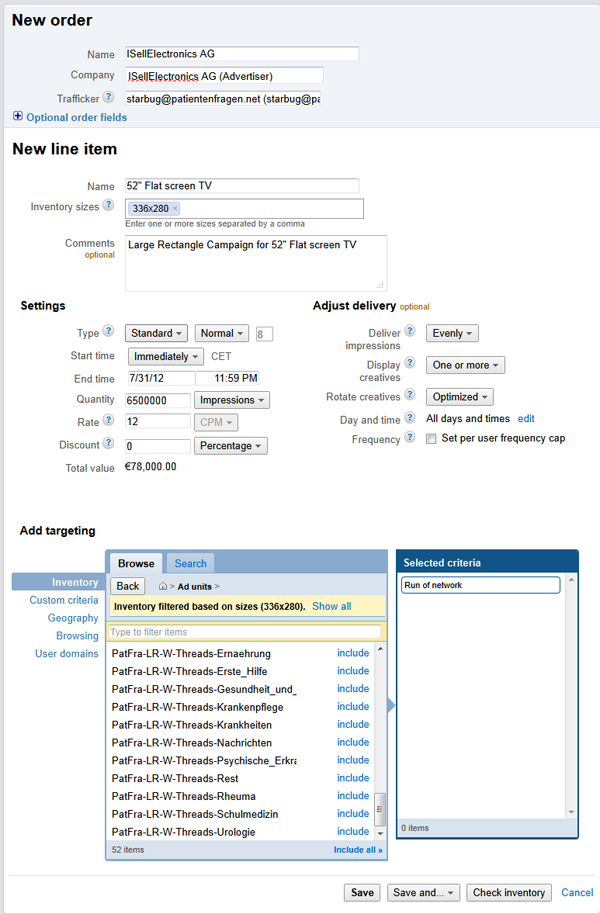
For this you click on the ‘New Order” Button.
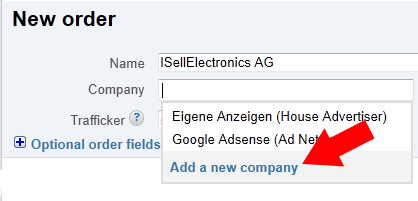
Fill in the Name ‘ISellElectronics AG’ (This is the name that will appear in your Orders List)
Then click on the Company Text Field and (if it is a new advertiser) click on ‘Add new company’
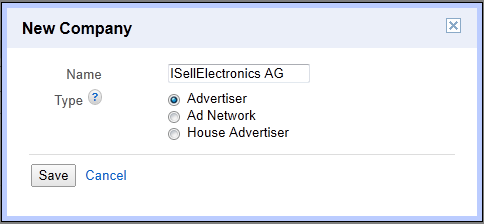
Name it ‘ISellElectronics AG’. You then have three options for the advertiser:
- Advertiser = A third party customer that advertises on your website(s)
- Ad Network = Ad Networks like Google AdSense where you don’t deal with a single Advertisers
- House Advertiser = Your own Company or Divisions of your company which places ‘in house’ Ads on your website
Select Advertiser and click Save.
You have created a new company profile. If you want to edit it you can do so by clicking on your Admin Tab (on the right) and then on Companies in the left navigation
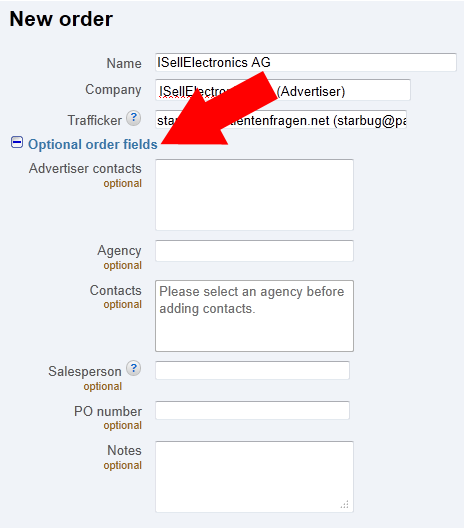
The next Entry is Trafficker. It should be prefilled with your Email. If you have several people working with your DFP Small Business Ad Server you can create User Accounts for them. A trafficker is the person responsible for managing this Advertiser on your Ad Server.
If you click on Optional order fields additional options will expand to add more information about your new advertiser like contact details.
Let’s say that ISellElectronics AG wants to run 2 different campaigns on your website.
One campaign is about their ’52” Flat screen TV’ and the other campaign is about their “Deluxe Washing Machine”.
So you need to create 2 Line Items for this Advertiser. You do that by defining the first Line Item when creating the Order for ISellElectronics AG
The names for the first Line Item from our Example is: 52″ Flat screen TV
For each campaign the Advertiser provided you with Banners (Image, Flash, HTML, etc.) of different sizes for your different Ad Units (depending on where the Advertiser wants its Ads to show in your Inventory).
If you click on Inventory sizes below the Line Item Name you get a drop down with all available sizes for Ad Units in your inventory. Select the appropriate sizes that match the campaign the Advertiser wants to run on your site.
Below you’ll find the Settings for this campaign.You can find a detailed explanation of the Line Item settings here: DFP Small Business Line Item Settings Explained
Under the option Ad Targeting you can now select the Ad Units or Placements on which you want to display the Ads from this campaign.
Because of the Ad Sizes you defined above you will only see Ad Units with the specified Ad Size to chose from.
After you have selected all the Ad Units you want the Ad to display in click on Save and you have set up your first Line Item/Campaign for this Advertiser.
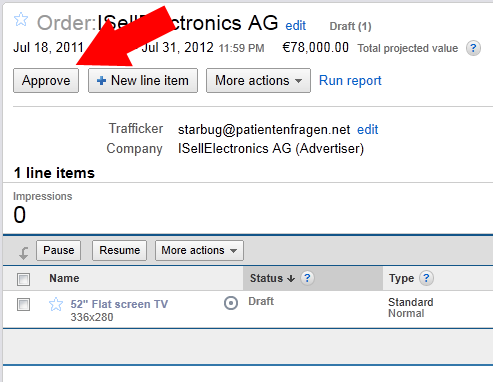
For your Ads to be served you need to Approve the newly created Order. You can do that right now or after you have set up everything. As long as you don’t approve the Order you are working in ‘Draft Mode‘
To setup another Line Item click on the newly created Order ‘ISellElectronics AG’ and then click on ‘+ New Line Item’.
Name your second Line Item for this Order: Deluxe Washing Machine
and repeat the steps from your first line item setup above according to your advertisers campaign requirements
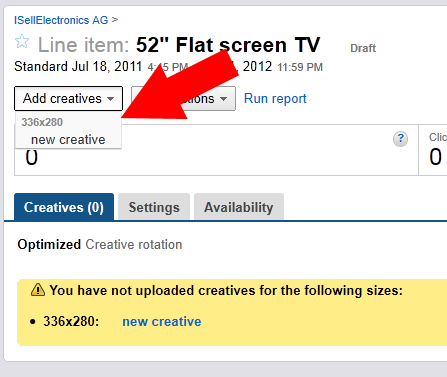
What you need to do now is to add Creatives (the actual advertising banners) to your Line Items. You do that by selecting the Line Item you just created and then click on ‘Add Creatives‘.
In the Add creatives drop down select the Ad Size for which you want to add a new Creative (you can only select Ad Sizes you set up for this Line Item) and click on new creative and chose which kind of creative you want to add.
In the next step you can select a creative type from multiple options which I think are well explained.
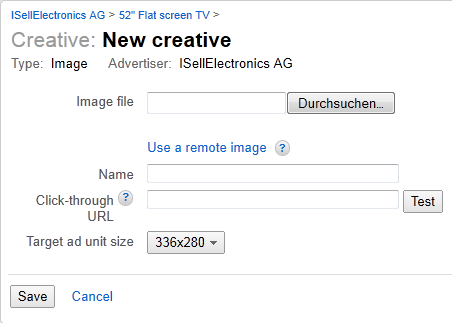
Let’s say you got banner images (jpg files) from your Advertiser so you select Image as creative type.
Select the image from your hard drive by clicking on browse, give it a descriptive name e.g. ‘Flat screen TV Rectangle’, define the target URL your Advertiser provided you with for this campaign and click on Save.
You now created your first Creative that will be served according to your Line Item specifications.
If you did not Approve (see above) your newly created Order you have to do so now or your creatives wont be served.
It can take up to 30 Minutes before a creative is going to be delivered after you have created it so be patient.
Repeat the process for all Creatives you got for the Advertisers campaigns and you are done.
Now DFP Small Business is serving your first Ads on your websites.

Would it be better to do two line items, at the sponsorship level, and set both to 50%? Or would it be better to do a single line item, and add two creatives, and have them distributed evenly?